| tags: [ electronics ] categories: [Mechanical Keyboards ]
Mechanical Keyboard
Discovery!
I was listening to an episode of my favorite podcast ReplyAll and someone mentioned a sub-reddit related to Mechanical Keyboards. This intrigued me so I started investing the topic on in r/MechanicalKeyboards. I have purchased several mass produced mechanical keyboards in the past and I have found some models that I like and a few that I don’t like. I’m always disappointed when an otherwise perfect keyboard presents some strange defect.
For example, the most recent keyboard I purchased would catch on the delete key occasionally. I’ve tried lub and even de-soldered the switch in question and replaced it with an alternative switch to try and correct the problem. Still not convinced that it’s better or not. Also the same keyboard will occasionally stop reporting a key that has been pressed repeatedly. It wasn’t a specific as specific position on the board that presented the problem, but it is more related to the action… I could reset the keyboard by pulling the USB line (turn it off and back on) and it would resume working until the next incident.
Anyway back to the topic at hand. I found this interesting sub-reddit on Mechanical Keyboards and I immediately got the urge to assemble one myself.
Planning out buy
There are several parameters to consider when deciding what to make. physical layout, key switch type, PCB features, case, etc. I found this article DIY Build your own mechanical keyboard to be very helpful to outline the considerations for buying and building my first keyboard.
One item that I really enjoyed about the notion of building my own keyboard is the prospect of choosing a key cap set that I liked. There are many different key cap sets available and they all have an interesting combination of colors, and key letter font. There is even a custom cap market where you can find all sorts of interesting single keycaps to complete your desired look.
Buzzkill
After some agonizing research, I decided that I wanted to build a 60% skeleton with Cherry blue switches. I decided to play it safe and go with a US site (1up Keyboards). I then ran into a complete buzzkill. The 60% PCBs were all out of stock! In fact quite a few things were out of stock the first time I tried to build an order.
Apparently supply and demand for Mechanical Keyboard kits is pretty messed up at the moment. There appears to be much more demand than there is supply.
Compromise
So I compromised a little bit on what was going to build. I decided to go with a 40% skeleton with Cherry Blue switches. What the heck. I would have to solder less and get the experience of building one of these.
Here is a photo gallery of my order:
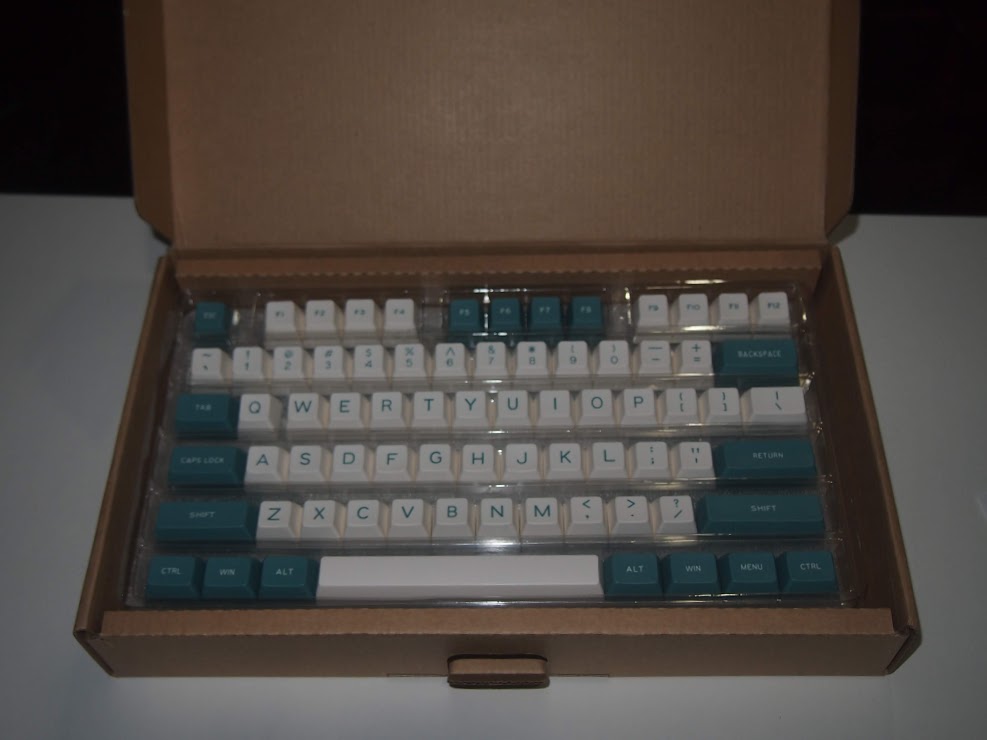
The beautiful Maxkey Green & White Keycap set I chose:
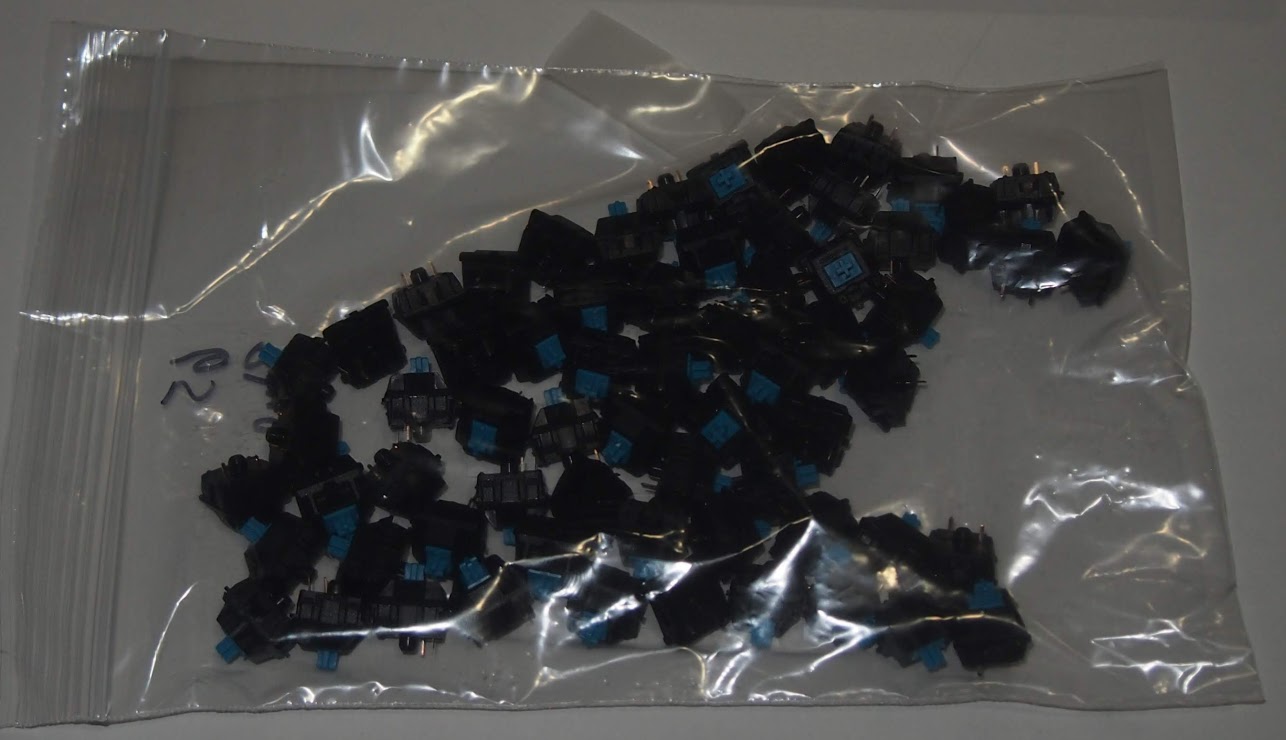
Here are the Cherry Blue Switches
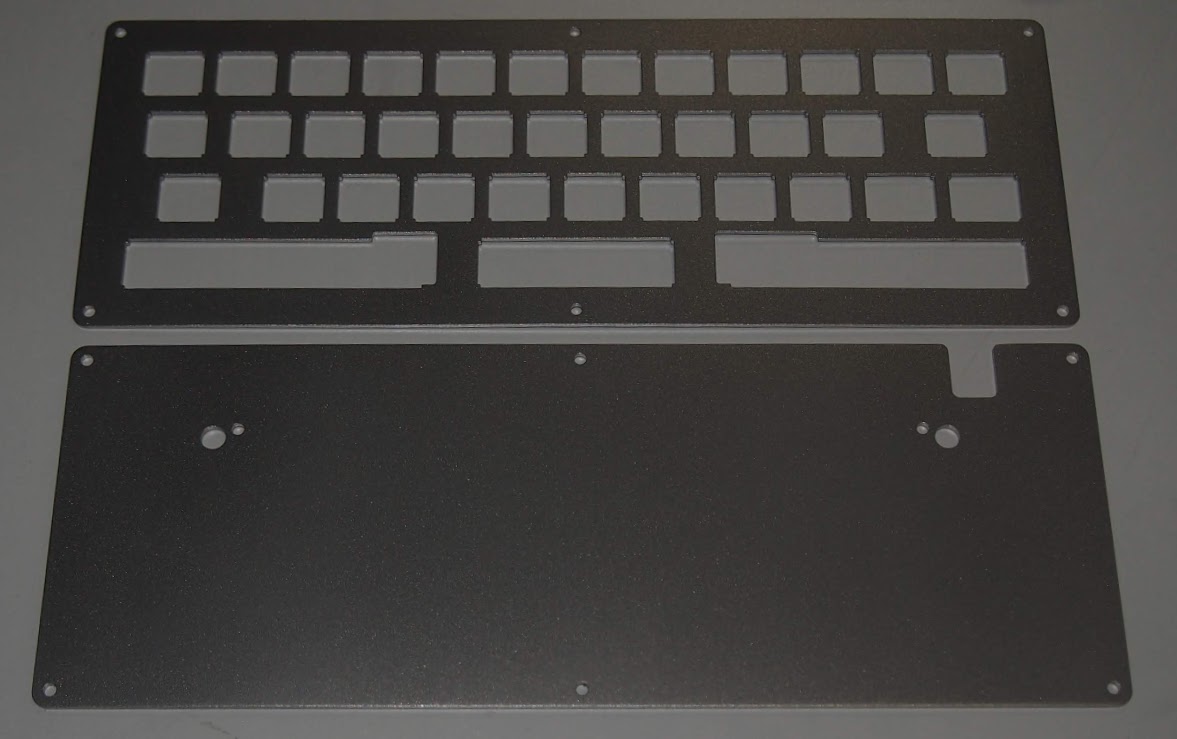
Keyboard skeleton top and bottom plates.
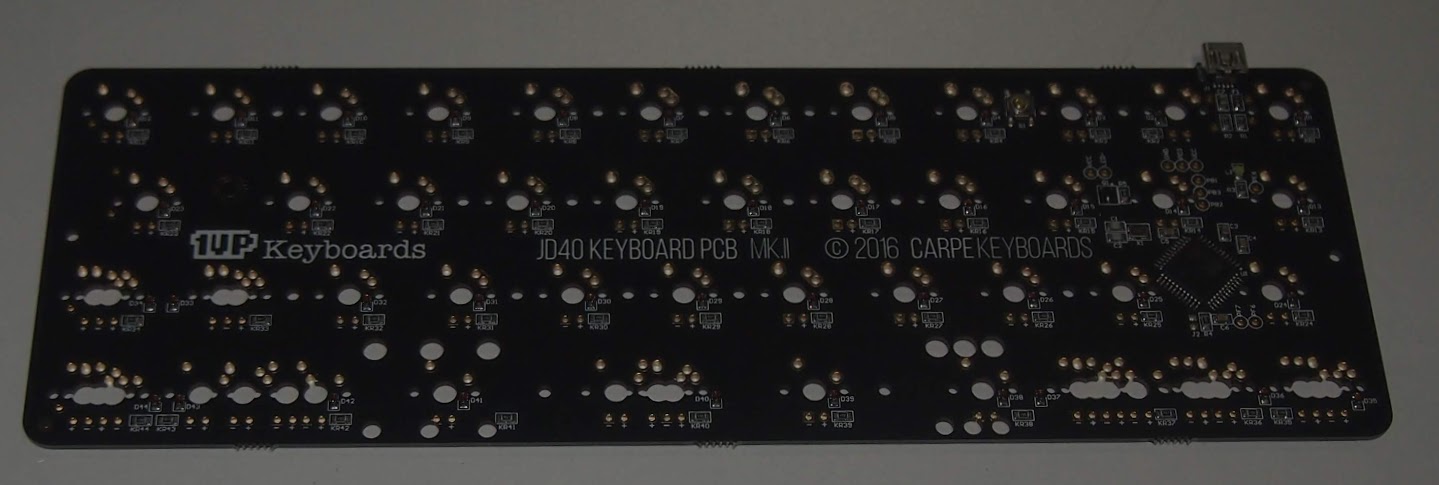
And finally the PCB that goes between the skeleton plates. The all switches are pushed through the skeleton top plate and soldered into the PCB.
Assembly
Assembling the keyboard from the kit I ordered was very easy. Just needed to heat up the soldering iron, and decide where exactly I was going to place the switches on the PCB. There are a few options for switch placement depending on what key caps you are planning to use.
In this next picture, I’ve soldered one key switch in the upper right and left corners and the the right and left keys in the second to bottom row. I did this so that I could plan out which keys placements would make the best sense for the bottom row keys.
I decided to go with a ‘split space bar’. The majority of the time I use my right thumb for space, not my left thumb. So I decided that splitting the spacebar would enable me to use the left button for something more useful for me. I’m still trying to figure out what to put on that left hand space bar.
A little bit frustrated that I had to choose some less than intuitive choices for ‘space bar’.
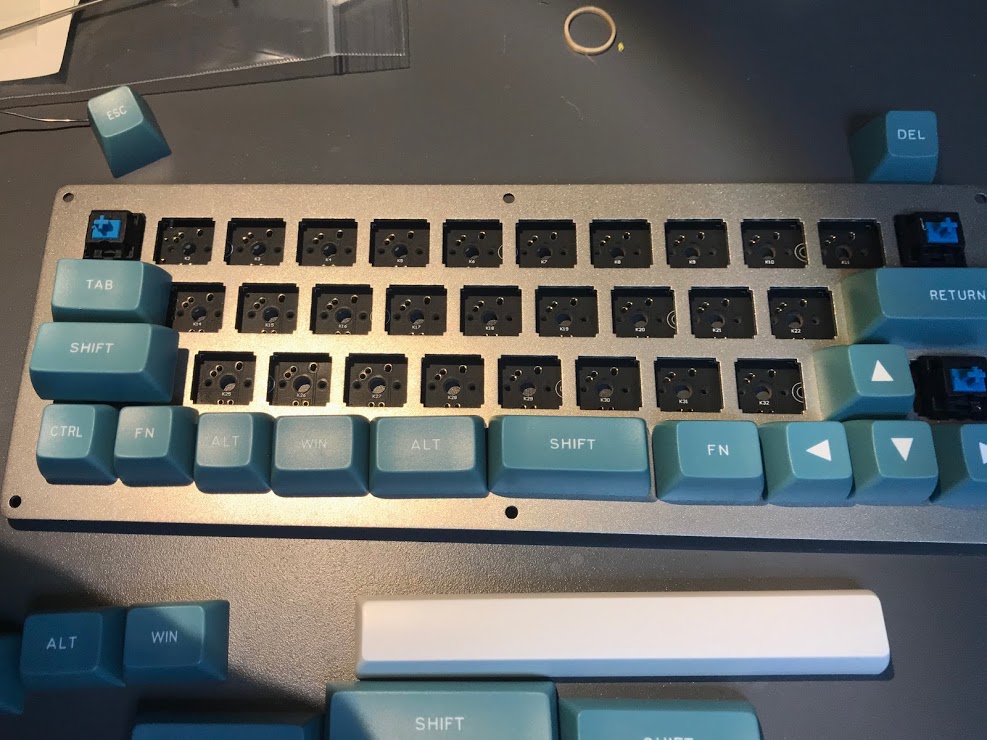
After a little planning, I soldered them all in about 30 minutes.
The soldering was a little intimidating to begin with, but after a few mistakes that required using a solder sucker, I settled down into a smooth groove. Heat up a pin, flow the solder down into the socket, move on to the next. Rinse and repeat. I would highly recommend setting up a ventilation fan for the soldering part. Quite a few fumes ejected by 80+ solder points.
Fortunately my PCB came loaded with a standard keyboard map so I was able to plug it in after getting the keys soldered in place and verify that the PCB was working as expected. But the real challenge came when I started trying to decide exactly how I was going to map out the keyboard for everyday use.
Custom Keyboard maps
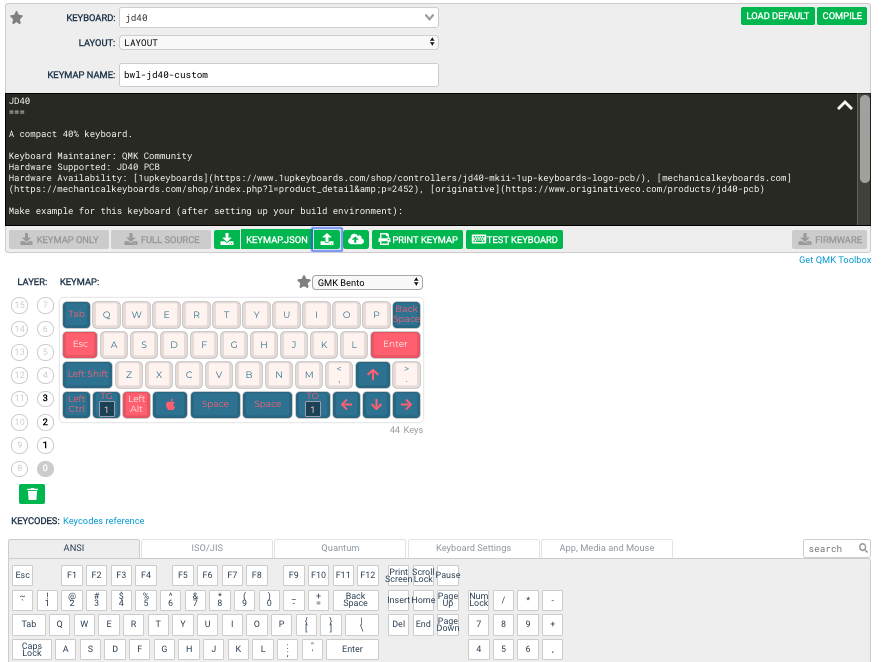
You can go down the “on prem” path of downloading the compiler and compiling your own keymap on your own hardware. I will probably do this eventually, but for immediate satisfaction, I used the QMK Configurator to interactively define a multiple layer key map and fortunately they have a on-demand compiler that will compile your keymap into a .hex file that you can then download.
Here’s an example of QMK Configurator with my jd40 PCB configuration (revision 58 or so…)
 )
)
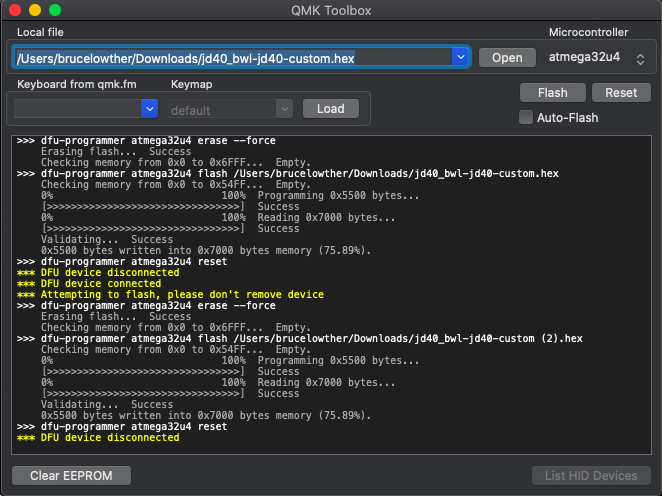
Once you have downloaded the .hex file, you will also need a bootloader to load the .hex file onto the ATMEL processor on the PCB. QMK provides the QMK Toolbox that will flash your PCB Micro-controller with your compiled configuration file (.hex).
Here is a screen capture of QMK Toolbox after loading a revision of
the compiled .hex build by QMK Configurator.
 )
)
Conclusions
There is a lot to learn here and I can’t say that I have it all figured out. But I was finally able to define a three layer keyboard map and flash it to the PCB and was able to start typing with the keyboard. Although it will definitely take some refinement to zero in on a key mapping that works well for me. There are definitely a lot of compromises that are necessary when trying to narrow down from 100+ keys on a full sized keyboard down to the 44 key custom keyboard that I am typing on right now.
Just for reference, here is the final product compared to a full 10key keyboard and a much smaller Apple Bluetooth keyboard.
 )
)
Fun stuff. More to do here.
